

Modernising Optimizely Commerce with Graph
Add modern, headless features to your existing Optimizely Commerce stack — no rebuild required

Storyblok Architect ~ Optimizely Most Valued Professional (OMVP) ~ CMS and Commerce certified
Contact MeIntegrating OpenID Connect (OIDC) with Optimizely Graph represents a key strategic decision for businesses aiming to bolster security within multi-application environments. OIDC offers a robust mechanism for authenticating and authorizing various users and systems that access Optimizely Graph, ensuring that interactions with the Graph database are not only secure but also meticulously controlled based on user roles and permissions. Implementing this level of detailed access management is crucial in settings where data security and precision in access control are of utmost importance.
Optimizely's documentation provides detailed guidelines on integrating OIDC with the Optimizely Graph instance. Our attempt to follow these guidelines revealed several subtle challenges that need to be navigated for a successful integration. This article offers a step-by-step account of our experience setting up Google's OIDC, serving as an additional reference point for those undertaking a similar implementation. In our case, we utilized the Google Cloud Console as our Identity Provider (IDP), a choice that presented its own unique set of considerations.
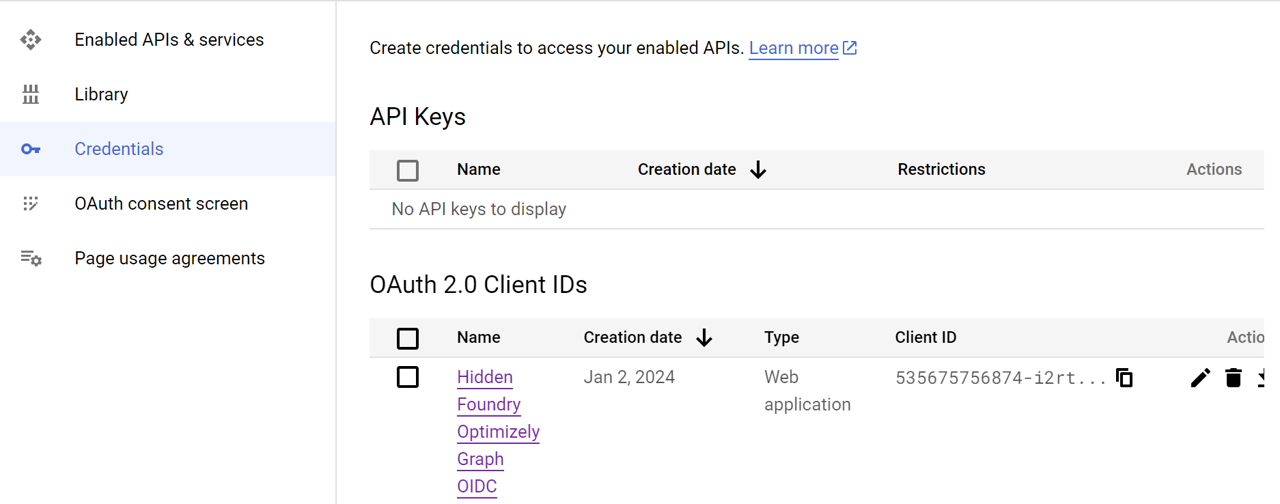
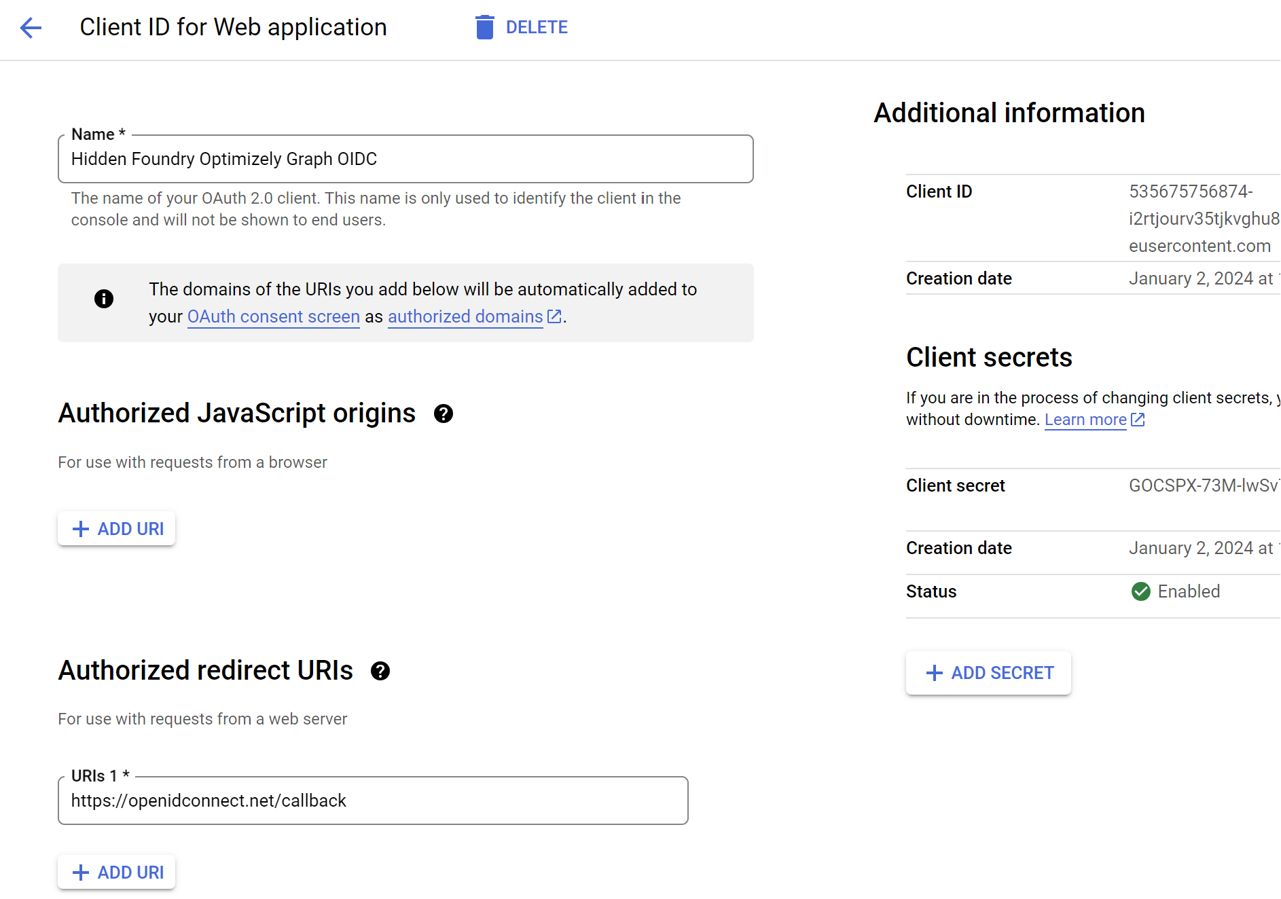
The integration journey begins in the Google Cloud Console. Here, you'll create a new project and generate OAuth 2.0 credentials, essential for establishing secure connections with Optimizely Graph.
We'll cover the process of updating the OIDC configuration and employing curl commands for seamless and secure authentication between Google Cloud and Optimizely Graph.
Take note of the client ID. You'll need to to register with Optimizely Graph.
Send a PUT request to OIDC config
URL: https://cg.optimizely.com/api/config/oidc

PUT /api/config/oidc HTTP/1.1
Host: cg.optimizely.com
Content-Type: text/plain
Authorization: Basic FQVSrZ221DsYYOWGNRlemRUQYESClReHjBnzV6USgSZQaX0RmF3IxF4SLWQ1UGG1NkFRbzrsWWu
{
    "issuer": "https://accounts.google.com",
    "audience": "s78265uh6ui7sk289vq5j9rgs9opr4c.apps.googleusercontent.com"
}
Begin by obtaining your ID token from Google's OpenID Provider (OP). Once acquired, this token is used in your initial request to Optimizely Graph, serving as a key to access the system.
It's important to note the presence of a 'tenant id' in the query string. Unlike other credentials, this 'tenant id' is not provided in the setup email. You will need to obtain it directly from Optimizely. This step is crucial as the 'tenant id' uniquely identifies your specific instance within Optimizely Graph, ensuring that your requests are correctly routed and handled.
POST /content/v2?tenant_id=9ee4a4ee4d0589a5e8438e561ed09130 HTTP/1.1
Host: cg.optimizely.com
Content-Type: application/json
Authorization: Bearer vedMIeVi7228yanuXCxTuSbLRB1duZFn.xw2X9ci21bxUIORiZ-E2o4jc3QimG6OO6Nf1XCQ4JRA9jNpyGSR2iezyZNYcJ0dfdf
Cookie: __cf_bm=ybycY-xe2xdU45cMEZWp6+CHYddKP54XM+ocIKe=8bEd5CyDKZ32i7AF1sjK1AH_v7EoltI7xW+LoC11l0X7pH-bvukXXT3wY45bZkRQUQBLO08-MRhoD/GBquGcEJmwbgxpQ6jUmtw
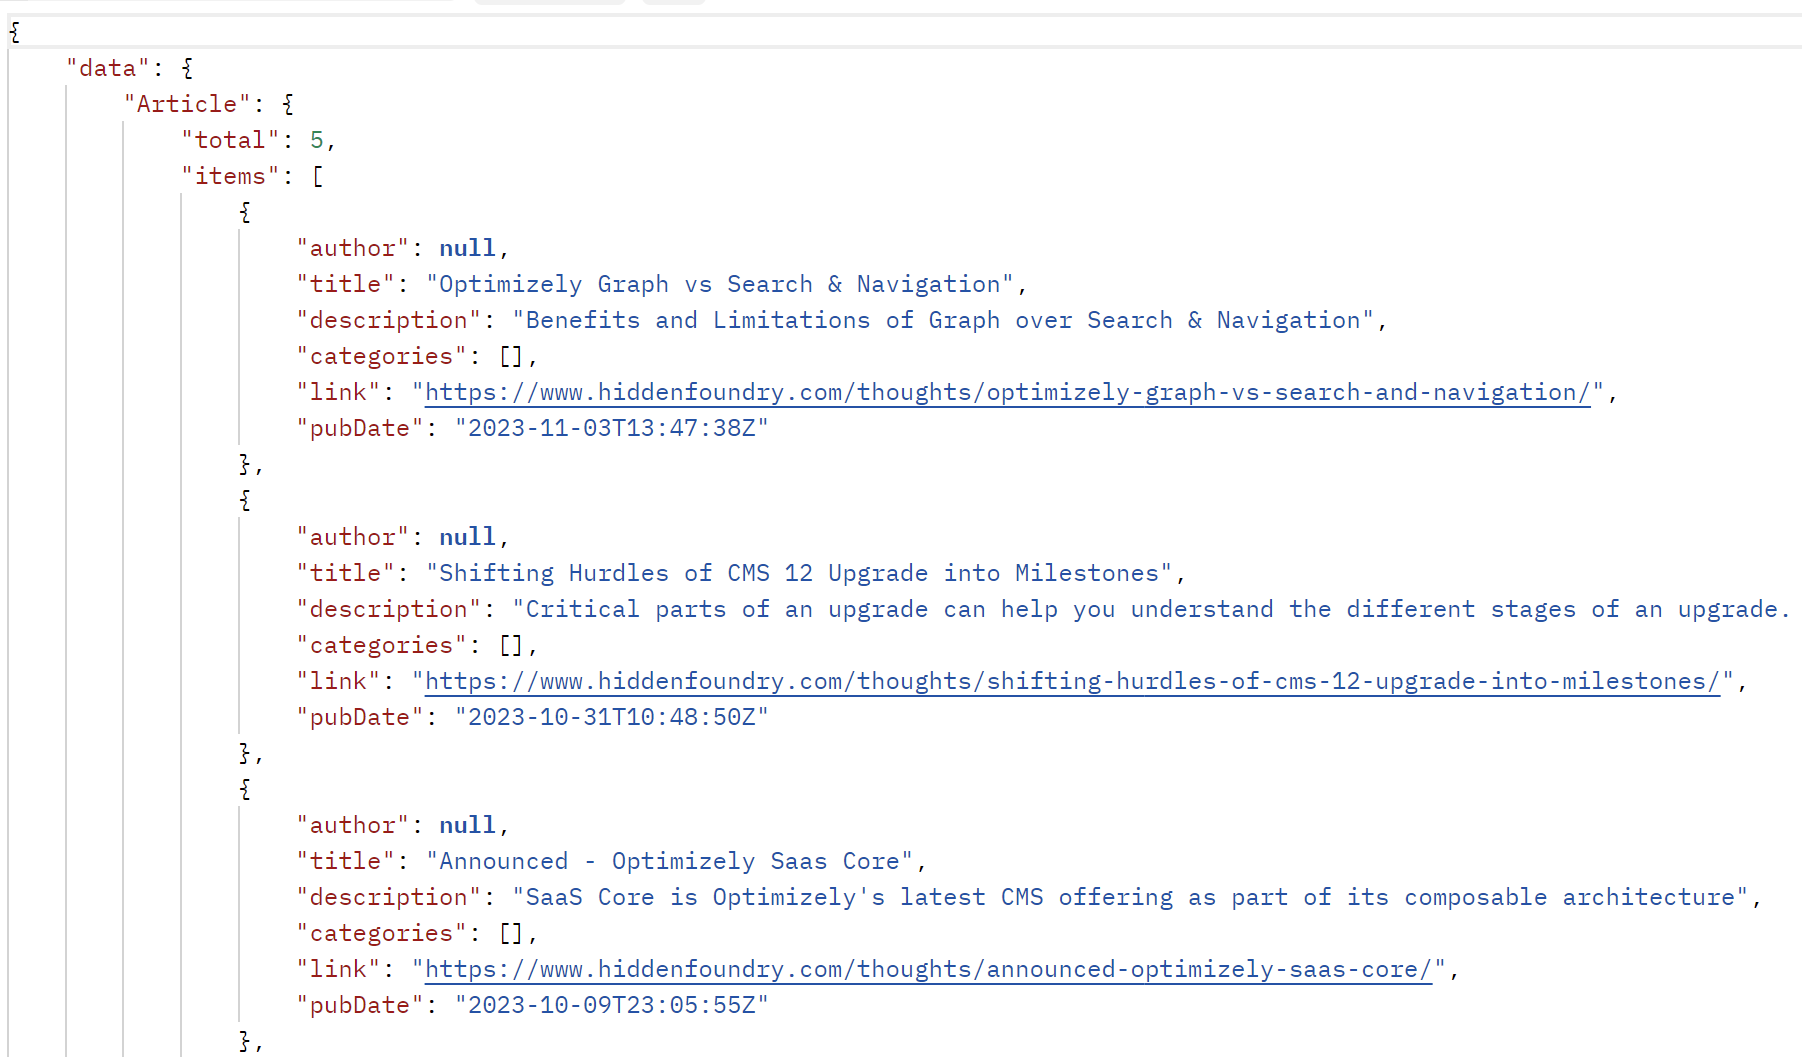
query MyQuery {
Article(orderBy: { }) {
total
items {
author
title
description
categories
link
pubDate
}
}
}
Securing your Optimizely Graph with Google Provider via Open ID Connect not only enhances security but also ensures that your Graph's advanced capabilities are harnessed optimally. For more in-depth instructions and code examples, refer to the Optimizely documentation here.
Add modern, headless features to your existing Optimizely Commerce stack — no rebuild required

Learn to integrate external data into Optimizely Graph for improved performance, covering data prepa

Benefits and Limitations of Graph over Search & Navigation

Artificial Intelligence driven search by Optimizely with GraphQL

We describe Optimizely's newest Content as a Service offering Optimizely Graph and how you should be